Long before they became a cheap children’s party food, jellies were revered on fashionable tables in the 19th century – valued as much for their ornamental use as for the pleasure of eating them.
The collection of handsome copper jelly moulds on display at Vaucluse House gives an idea of how sculptural jellies could be. Even before the industrial revolution made moulds affordable, jellies were formed into pretty and wondrous displays of creativity, from ‘floating islands’ to ‘fish in a pond’.
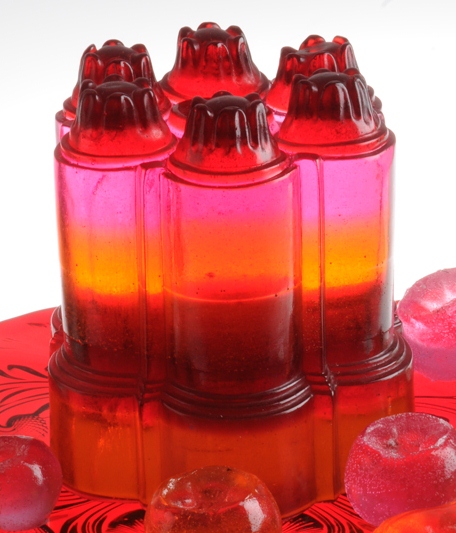
Resin jelly made by artist Janet Tavener, from a nineteenth-century mould in the Vaucluse House collection. Photo © Janet Tavener
A visual delight
Before factory made moulds became available, ‘free formed’ jellies such as ‘fish ponds’, ‘moon & stars’, ‘hen’s nests’, and ‘bacon & eggs’ made with flummery. Some of us revisit the practice today, creating novelty jellies for children’s birthday parties, such as ‘frogs in a pond’, which can trace its origins to the 1700s ‘fish in a pond’.
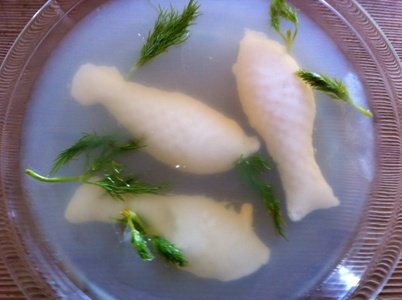
‘Fish in a pond’ inspired by Elizabeth Raffald, 1769. Photo © Jacqui Newling
Finding form
Jellies were both clear and solid coloured; milk jellies were known as flummeries or, taking the French term, blancmange, and were originally made with sweetened almond milk. Natural dyes could be used to colour them – real cochineal, made from crushed beetles, for red, beetroot juice for pink, green from spinach juice and yellow using saffron.
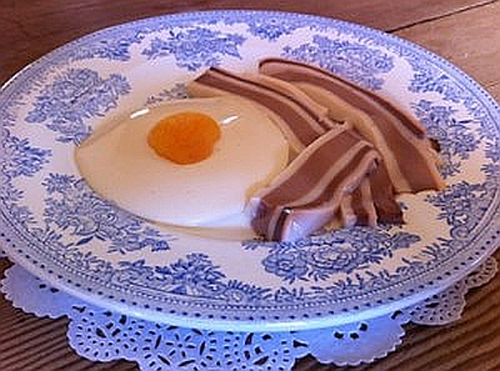
Bacon and egg in flummery. Photo © Jacqui Newling for Sydney Living Museum
Bacon & eggs in flummery
To make the bacon, alternate layers of plain white flummery and chocolate almond milk coloured with a touch of beetroot juice were set in a shallow cake tin. Once fully set it was sliced into ‘rashers’. The egg was formed by setting plain white flummery in a shallow saucer, and inverted onto the plate. A small hollow is then made to accommodate the ‘yolk’ which is a poached dried apricot.
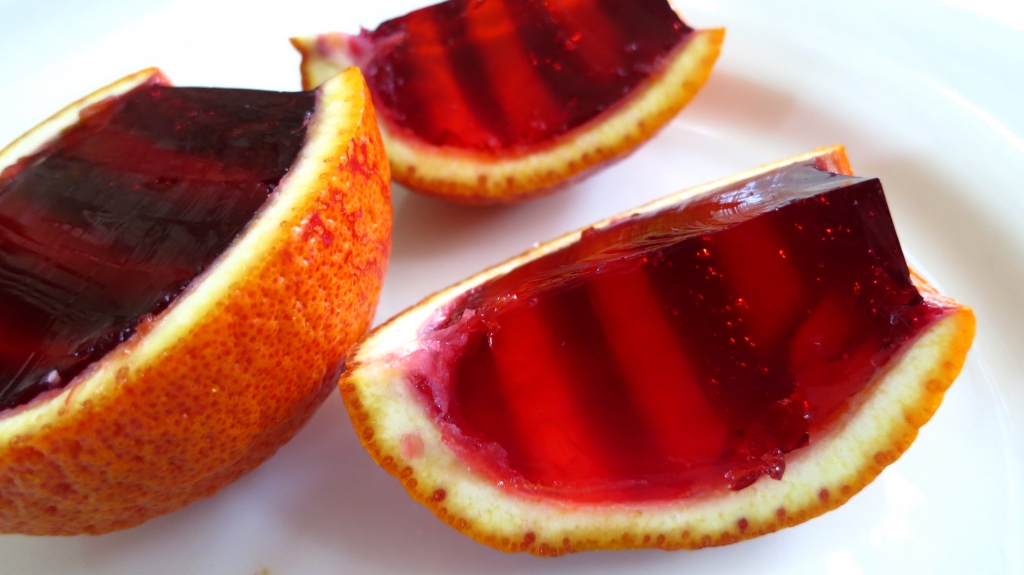
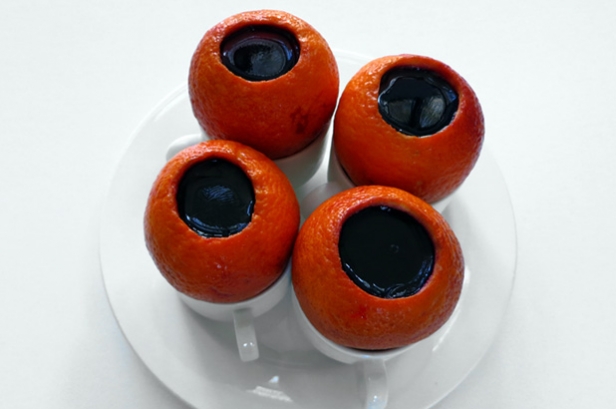
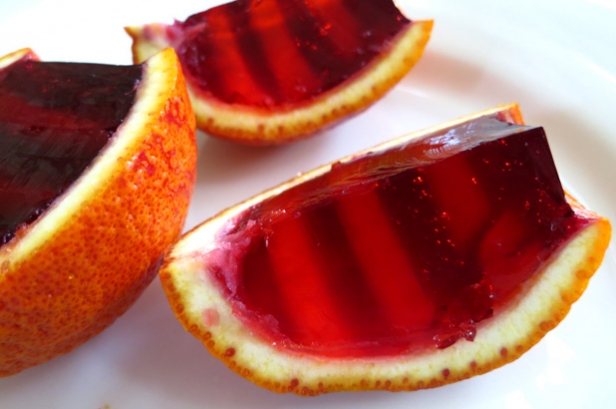
Jelly filled oranges, sliced. Photo Alysha Buss © Sydney Living Museums
Jelly filled oranges
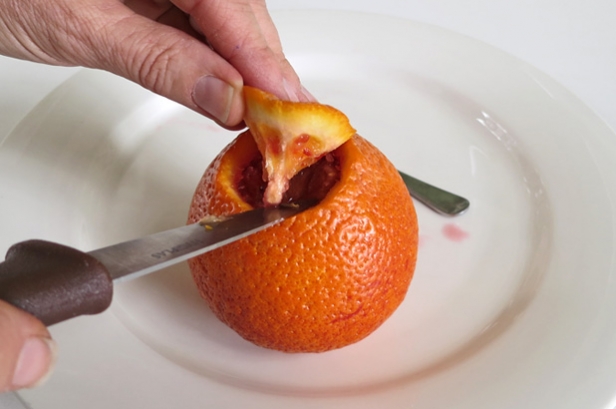
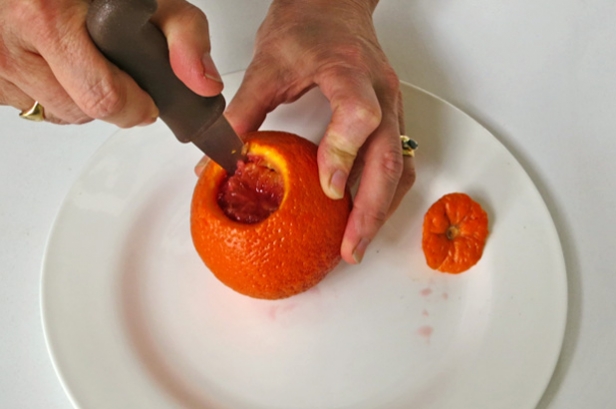
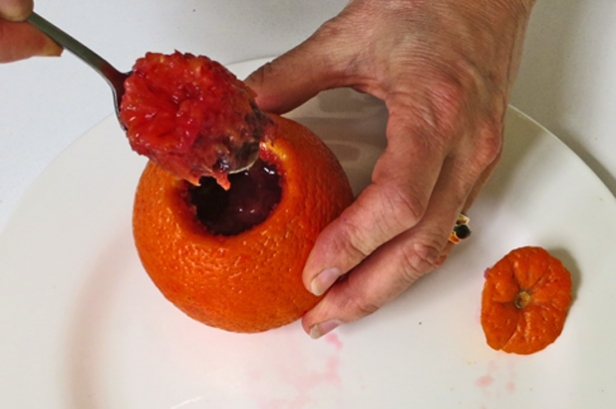
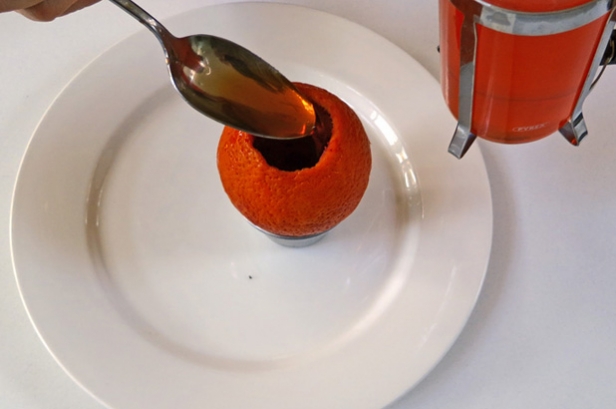
Jelly filled oranges was a dish fit for kings in the early 1800s. ‘Ribband’ or ribboned jellies had long been popular, using alternate layers of coloured jelly or flummery (as per the bacon), or contrasting layers of flummery and clear jelly. Antonin Carême featured this dish in the dessert course at Chateau Rothschild in 1829. Oranges are hollowed out and filled with layers of clear fruit jelly coloured with real cochineal and almond milk blancmange. The original recipe calls for Isinglass – a natural source of gelatin extracted from the swim bladder of a sturgeon (still used in clarifying wines today) but of course we now have the convenience of instant granulated or sheet gelatin.
Jelly-filled oranges
Ingredients
- 4 packets jelly crystals (85 g) of 2 or more contrasting colours
- boiling water
- 6 valencia oranges (do not use navel oranges)
Note
To create the striped effect, each layer of jelly needs to set before another layer can be added, so allow a few hours for each layer. If you want a quicker option, fill each orange with a different colour and mix them up on the serving plate once they have been sliced.
Makes 6 oranges
Directions
Hidden origins
Instead of being made with a colourful ‘Aeroplane’ sprinkle, jellies were made from scratch, the gelatin made from rendered animal bones, usually calf’s feet. The Wentworth’s expenditure accounts from 1844 make specific reference to ‘gelatine dishes’ being purchased for their Hunter Valley property, indicating that gelatin manufacture was a by-product of the family’s extensive meat processing business interests in the district (the gelatin being extracted from beef cattle). We get into the grim side of jelly making in another post (not for the faint-hearted).
 Print recipe