Kim Connor is currently undertaking an internship at Hyde Park barracks as part of her research project ‘Feeding the confined’ for her honours studies in archaeology at Sydney University. Kim’s particular interest is the diet of the women at Hyde Park barracks when it was the Immigration Depot and the Destitute Asylum between 1848 and 1886. Kim is our guest author this week, as with true gastronomic gusto, she not only reads about the types of food that the women ate, and how it was prepared, she attempts to recreate some of the food to support her thesis. What was the food like? Was it enough? And for today’s story – just how bad does bread and dripping taste?
A pound per day
The first thing that I needed to figure out was the bread because it was the eaten with every meal of the day. Each woman in the institutions received a pound of bread per day, or about 450g of bread. That’s roughly two thirds of a modern loaf of bread per person, per day!
Even though bread had been baked on-site during the convict period, it was bought in for the Asylum and the Depot. Fresh bread would have arrived at the barracks daily in two pound loaves, and each woman took a whole loaf every other day [1]. Even if that meant that your bread was a bit stale on the second day, I guess it meant that you could decide when and how you wanted to eat it.
In the early years of the Immigration Depot (which opened in 1848) the bread was probably wholemeal, because the doctor specifically ordered white loaves for people who were sick [2]. By the late 1860s, though, the Depot and the Destitute Asylum were only being provided with 1st quality bread which would have been white [3].

Model bakery, in “Where to Buy at Cheltenham. An Illustrated trades’ review, by the editor the “Agents’ Guide,” etc.’, 1890 p.37 by The British Library. Licensed under no known copyright restrictions.
Industrial versus home-made bread
At the beginning of the 19th century, baker’s bread was produced in much the same way as if you were making it at home, just on a larger scale. By the end of the century, though, the trade had undergone huge changes and industrialisation of the bread making process was well underway.
In the picture above you can see a large bakery in 1890 decked out with steam ovens on the back wall, and some bakeries would also have mechanical mixing machines. At the same time, the loaves on the table in the foreground are a mixture of the new square loaves, made in tins, and the more traditional cottage loaf which is shaped by hand.
Vienna Bread: Small Bakers and Hotels.
Quantities. – 2 ozs. yeast; 1 quart water; 1 quart milk; 1 oz. sugar; 1 oz. salt; and 9 lbs. finest Hungarian flour. Put in a sponge, with the milk and water at 90 degs. (Fahr.), yeast sugar, and flour to make a batter sponge. Let this rise and fall, and then make the dough. Powder the salt on to the sponge, and mix in with enough flour to make a light dough. It will be ready for moulding in an hour.
The Baker’s Guide and Practical Assistant (1899) [4]
In spite of that, even at the end of the century many of the recipes professional bakers used would have been recognisable to a home baker. You can see that the recipe above, from The Baker’s Guide and Practical Assistant (1899) isn’t that different from Eliza Acton’s domestic recipe:
Good Family Bread
Flour, a quartern, or half gallon (3 lbs.); solid brewer’s yeast, one tablespoonful; or German yeast, nearly one ounce; warm milk and water, or water only, one pint and a quarter to one pint and a half. When made by setting a sponge, to be left to rise for an hour, or more if needed, then made lightly into two loaves, sent to the oven from an hour to an hour and a quarter, or baked in one loaf from one hour and a half to two hours.
The English Bread-Book for Domestic Use (1857) [5]
The bread for the Destitute Asylum and the Immigration Depot was brought in from commercial bakers, but it was still a lot closer to home-made bread than the mass-produced, pre-sliced loaves that you can buy in the supermarket today.

Two-pound loaves made with an Eliza Acton recipe 1857 (recipe below). Photo © Kim Connors
But what is German yeast?
Before the invention of dried yeast in the early 20th century, bakers used a variety of different methods for leavening their bread. Sourdough bread, which used a starter made from wild yeasts is one of the oldest and most well-known methods, but bakers could also keep a bit of the dough for the next batch, which is called ‘old dough’, make their own mash from hops or potatoes, or use brewer’s yeast.
At the end of the 18th century, Dutch brewers and distillers began to sell the yeast left over from brewing in small, solid cakes, and the process soon spread to Germany where J.H Tebbenhoff was an early adopter [6]. By 1846 Australian newspapers were reporting that ‘German yeast’ was being imported into England from Rotterdam, and that it was becoming “a good deal used” [7]. Nowadays we call this fresh or compressed yeast, and you can buy it from good grocers.

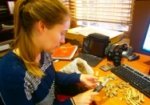
Fresh yeast, referred to in the 19th-century as ‘German’ yeast. Photo © Kim Connors
Recreating 19th-century bread
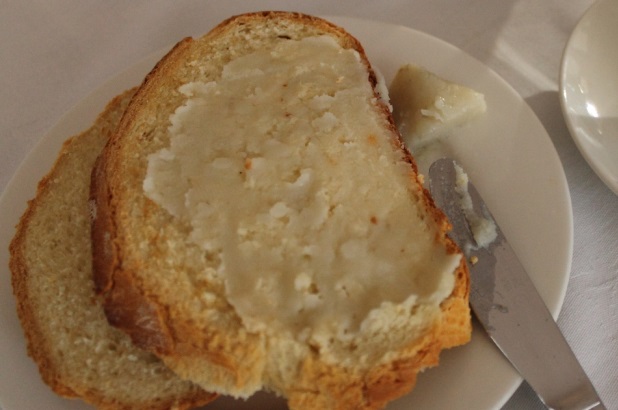
I used Eliza Acton’s recipe for ‘Good Family Bread’ to make my bread (recipe below). It makes soft, delicious white bread that is perfect for sandwiches. You do have to add some salt, which has been forgotten in the original recipe and I’ve scaled it down to make two x 2 pound loaves, just like they had at Hyde Park Barracks. If you really want to enjoy it the way that the women did, try it with dripping and a well brewed cup of tea!
: Bread with dripping (the fat skimmed from the soup) and tea. Photo © Kim Connors")
Breakfast and supper fare in the Immigration Depot and the Destitute Asylum (1848-1886): Bread with dripping (the fat skimmed from the soup) and tea. Photo © Kim Connors
Good family bread
 Print recipe
Ingredients
- 1400g strong bread flour
- 24g fresh yeast
- 200ml milk, lukewarm
- 525ml water, lukewarm
- 27g salt
Note
This recipe is based on Eliza Acton’s ‘Good Family Bread’ (1857). It makes soft, delicious white bread that is perfect for sandwiches. You do have to add some salt, which has been forgotten in the original recipe.
Directions
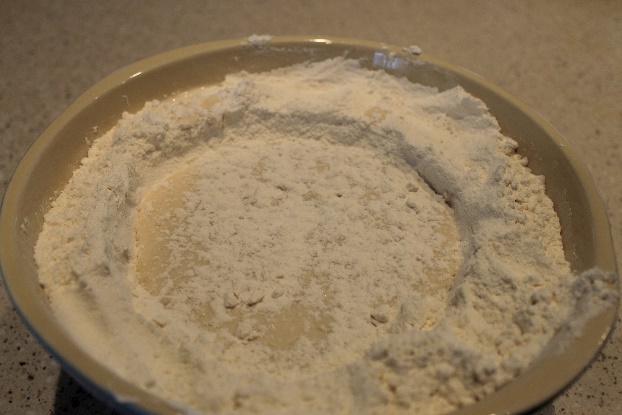 Place the flour in a large bowl and make a well in the middle. In another bowl combine the milk, and 160ml of the water. Crumble the yeast onto the liquid and stir well. Pour the liquid mixture into the well of the flour. Carefully stir some of the flour from the edges of the well into the liquid. Do not try to mix all of the flour and liquid together, just enough to make a thick batter (see images above). Sprinkle some more of the flour on top of the batter, cover the bowl with a tea towel and leave for an hour. | |
 At the end of an hour, the yeast should have risen nicely and have bubbles on the surface. Sprinkle the salt on top of the batter, and add the rest of the water. Mix everything together to form a ball, then turn it onto a lightly floured surface and begin to knead. Add a little more water to the dough if it’s too dry to come together as a ball. Knead for 10 minutes, or until the dough passes the windowpane test (can be stretched to be almost see-through without breaking). Place the dough in a clean bowl, cover with a tea towel and leave for 45 minutes. | |
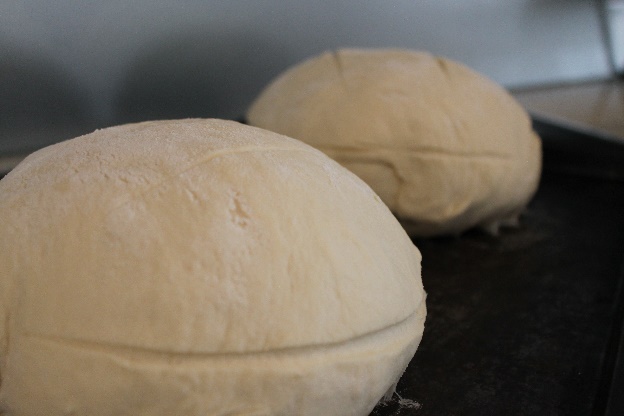 Pre-heat the oven to 220ºC, with a large baking tray in the oven which the bread will go on, and a deeper tray below that. Boil a kettle of water. Wet a sharp knife and use it to cut the ball of dough in half. Take each half and gently pull the edges down around the cut edge and pinch the edges at the bottom to form a ball of dough. Try not to manipulate the bread too much because we want to keep as much of the natural gases in the dough as possible. When both loaves are ready, wet the knife again and make a shallow cut all the way around the loaves. Also make one or two cuts across the top of the loaves. Carefully remove the hot baking tray from the oven and place the loaves of bread on it. Return it to the oven, and pour about a cup of hot water from kettle into the second, deeper tray in order to create a steamy environment for the bread to cook in. Be very careful that you don’t burn yourself with the steam. Close the oven door and bake for 10 minutes, then turn the oven down to 200ºC and continue to bake for another 50-65 minutes. The bread should be well-risen and golden brown, and sound hollow when knocked with your knuckles. Remove the bread from the oven and turn upside down to cool on wire racks. Wait until they are totally cold before slicing. | |
[1] In response to Q2323-2324 NSWLAVP, Second Report of the Commission Appointed to Inquire Into and Report Upon the Working and Management of the Public Charities of the Colony (Sydney: Thomas Richards, Government Printer, 1874), 75.
[2] For example, State Records NSW: NRS 5239, [9/6192] Item 49/1515.
[3] Frederic King, “Contracts for Bread, Meat, Groceries &c. For the Government Asylums at Sydney, Parramatta, Liverpool, and Port Macquarie,” NSW Government Gazette, October 27, 1868, No. 264 edition; Frederic King, “Contracts for Bread, Meat, and Groceries for the Government Asylum at Sydney,” New South Wales Government Gazette, February 18, 1870; State Records NSW: NRS 5239, Item 57/1891.
[4] John Blandy, The Bakers Guide And Practical Assistant To The Art Of Bread-Making In All Its Branches, 4th Ed. (London, 1899), 139, http://archive.org/details/TheBakersGuideAndPracticalAssistant.
[5] Eliza Acton, The English Bread-Book for Domestic Use (London: Longman, Brown, Green, Longmans & Roberts, 1857), 134–35.
[6] J. Stewart Harrison, “Food and Fodder Yeasts,” in The Yeasts: Yeast Technology, ed. Anthony H. Rose and J. Stewart Harrison, 2nd ed. (London: Academic Press, 1993), 402.
[7] “Tropical Australia,” The Maitland Mercury and Hunter River General Advertiser, June 20, 1846, 3.